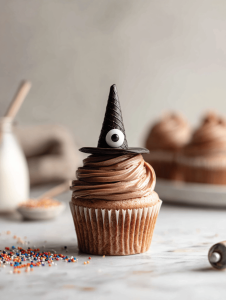
I’ve always loved the idea of turning something ordinary into a tiny piece of magic. These witch hat cupcakes started as a joke between friends, but they’ve become a seasonal staple. The best part? They’re simple enough for a weekend project but look impressively spooky. It’s like baking a little spell with every batch.
Why I Keep Coming Back to These Cups
They’re a reminder that baking can be playful and not just about perfect results. Each batch feels like a tiny rebellion against the ordinary. Plus, the smiles from friends and kids make every effort worth it. They’re a small celebration, no matter the season.
Breaking Down the Magic: Key Ingredients
- All-purpose flour: Gives structure and body to the cupcakes, like a blank canvas.
- Granulated sugar: Sweetens and tenderizes, balancing the rich butter.
- Butter: Adds richness and a tender crumb—go real butter for best flavor.
- Eggs: Bind everything together, creating a moist crumb.
- Dark cocoa powder: For that deep, smoky chocolate flavor—use Dutch-processed for less acidity.
- Milk: Moistens the batter, making cupcakes soft and fluffy.
- Black food coloring or dark fondant: Turns the decorations into eerie, witchy hats—trust your eye, add gradually.
Tools and Equipment for Witch Hat Cupcakes
- Muffin tin: Holds the cupcakes as they bake and helps maintain shape.
- Mixing bowls: Combine ingredients thoroughly.
- Electric mixer: Cream butter and sugar efficiently.
- Piping bag and tips: Decorate the cupcakes with frosting.
- Fondant or black icing: Create the hat’s shape and details.
Step-by-Step Guide to Crafting Your Witch Hat Cupcakes
Step 1: Preheat your oven to 180°C (355°F).
Step 2: Line a muffin tin with paper liners.
Step 3: Mix your dry ingredients: flour, sugar, baking powder, a pinch of salt.
Step 4: Cream butter and sugar until light and fluffy, about 3 minutes.
Step 5: Add eggs one at a time, then vanilla extract.
Step 6: Alternate adding milk and flour mixture, starting and ending with flour.
Step 7: Fill cupcake liners about 2/3 full with batter.
Step 8: Bake for 20-22 minutes, until a toothpick comes out clean.
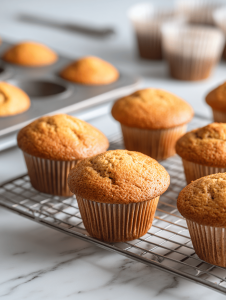
Step 9: Let cupcakes cool in the tin for 5 minutes, then transfer to a wire rack.
Step 10: Once cooled, frost with your favorite frosting, preferably a dark chocolate or black icing.
Step 11: Use a cone-shaped piece of fondant or black icing to create the hat brim.
Step 12: Add a small triangle of fondant on top to mimic the hat’s point.
Step 13: Decorate with candy or sprinkles for extra magic.
Cooking Checkpoints & Tips for Witch Hat Cupcakes
- Ensure oven is fully preheated before baking.
- Cupcakes should be golden on top, not too pale or burnt.
- Frosting should be firm enough to hold the hat shape.
- Fondant or icing needs to be dry and set, not sticky.
Common Mistakes & How to Fix Them
- Fondant collapsing or not holding shape.? TOO FLAT HATS. Use thicker fondant or double-layer decorations.
- Dry, crumbly cupcakes.? OVER-BAKED CUPCAKES. Reduce oven time or lower temperature slightly.
- Frosting sliding off or melting.? FROSTING MELTING. Chill cupcakes before frosting or use a stiffer frosting.
- Decorations falling over.? HATS NOT STANDING. Use a small amount of edible glue to secure.

Witch Hat Cupcakes
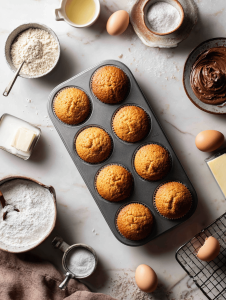
Ingredients
Equipment
Method
- Preheat your oven to 180°C (355°F) and line a muffin tin with paper liners. This prepares your workspace for even baking and easy cleanup.
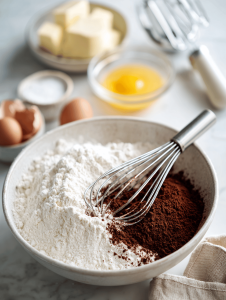
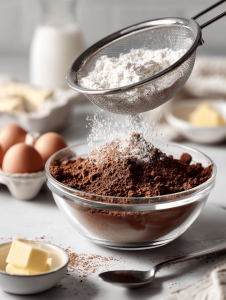
- Sift the flour and cocoa powder together into a large mixing bowl to remove lumps and combine flavors evenly.
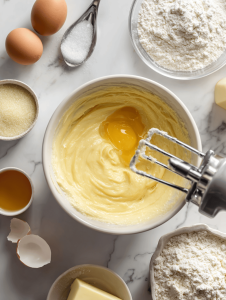
- In a separate bowl, beat the softened butter and sugar with an electric mixer until the mixture is light, fluffy, and slightly pale—that’s about 3 minutes and fills your kitchen with a sweet aroma.

- Add eggs one at a time to the creamed mixture, beating well after each addition, to build a smooth, glossy batter.
- Pour in the milk gradually, mixing on low speed, to keep the batter silky and moist.
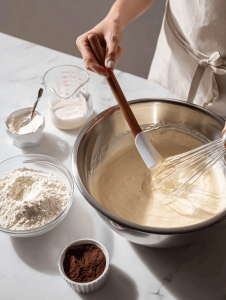
- Slowly fold in the sifted flour and cocoa mixture, mixing gently until just combined—don’t overmix to keep the cupcakes tender.
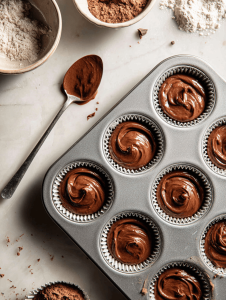
- Using a spoon or scoop, fill the paper liners about two-thirds full with the batter to allow room for rising.
- Bake in the preheated oven for 20-22 minutes, or until a toothpick inserted into the center comes out clean and the tops are slightly domed.
- Remove the cupcakes from the oven and let them cool in the tin for 5 minutes before transferring to a wire rack to cool completely—this prevents sogginess.
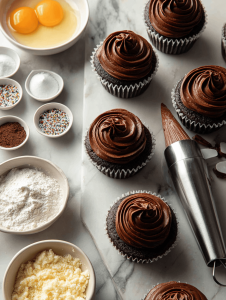
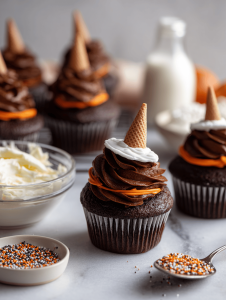
- Once cooled, frost the cupcakes with dark chocolate or black icing using a piping bag for a smooth, spooky finish.
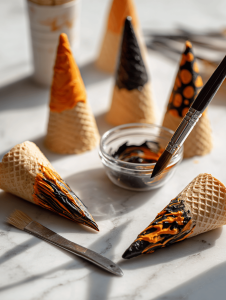
- Roll out some black fondant to about 1/8 inch thickness and cut out small circles for the hat brims and triangles for the hat points.
- Place the fondant pieces on top of the frosted cupcakes to assemble the witch hats, adding details like sprinkles or candies for extra magic.
Notes

Welcome to Owning This Stove. I’m so glad you’re here. I’m a food blogger, recipe developer, and storyteller who believes food is one of the most honest ways to understand a place, a person, or a moment in time. This blog is where I collect those moments, from quiet mornings in unfamiliar kitchens to crowded cafés filled with conversation and clinking cups.