Making mummy brownies isn’t just about the chocolate, it’s about reclaiming a moment of childhood chaos. There’s a messy, honest joy in stirring a thick, dark batter and knowing this will turn into something sweet and warm. Sometimes, I think of baking as a small rebellion—an act of pouring love into something imperfect but real.
Why I Keep Coming Back to These Brownies
There’s a nostalgic rush in each bite, a reminder of carefree afternoons. They’re forgiving when I’m rushed, yet rich enough to slow down and savor. Baking them feels like stitching together a quiet moment of joy amid chaos. They’re simple, honest, and always seem to turn a day around.
Dissecting the Ingredients of Mummy Brownies
- Dark chocolate: Rich, intense flavor creates that signature fudgy texture, but swap with semi-sweet if you prefer milder.
- Butter: Adds moisture and a velvety mouthfeel, but coconut oil can be a dairy-free substitute.
- Eggs: Bind everything together and enrich the batter, essential for structure.
- Sugar: Sweetens and enhances cocoa flavor, but honey or maple syrup can be used for a different sweetness.
- All-purpose flour: Provides structure; gluten-free options like almond flour work but change the texture.
- Vanilla extract: Brightens the chocolate, making flavors pop.
- Salt: Balancing agent that intensifies chocolate taste.
Tools & Equipment for Mummy Brownies
- 8-inch square baking pan: Shape and contain the brownies during baking.
- Parchment paper: Prevent sticking and make lifting out easier.
- Double boiler or microwave-safe bowl: Gently melt chocolate and butter.
- Rubber spatula: Fold ingredients gently without deflating the batter.
- Toothpick or skewer: Test doneness of brownies.
Step-by-Step Guide to Baking Mummy Brownies
Step 1: Preheat your oven to 175°C (350°F).
Step 2: Line an 8-inch square baking pan with parchment paper, leaving some overhang.
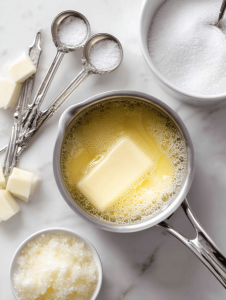
Step 3: In a bowl, melt 125g of butter and 200g of dark chocolate together over low heat, stirring until smooth.
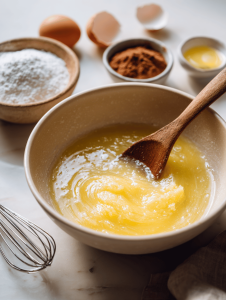
Step 4: Remove from heat and stir in 2 eggs, one at a time, mixing well.
Step 5: Add 150g of sugar and a teaspoon of vanilla extract, blending until glossy.
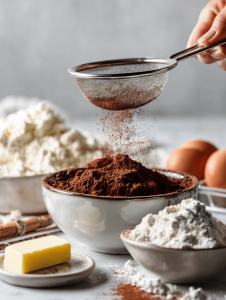
Step 6: Fold in 100g of all-purpose flour and a pinch of salt.
Step 7: Pour the batter into the prepared pan, spreading evenly.
Step 8: Bake for 25-30 minutes, or until a toothpick inserted in the center comes out with moist crumbs.
Step 9: Let the brownies cool in the pan for 10 minutes, then lift out using the parchment overhang and cool completely on a wire rack.
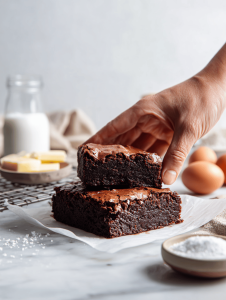
Step 10: Cut into squares and serve slightly warm or at room temperature.
Cooking Checkpoints & Tips for Perfect Mummy Brownies
- The batter should be shiny and smooth before pouring.
- The edges will look set but the center remains fudgy.
- A toothpick should come out with moist crumbs, not wet batter.
- Brownies will firm up a bit as they cool, so don’t overbake.
Common Mistakes & How to Fix Them
- Oven runs hot or cold.? Use an oven thermometer to ensure proper temperature.
- Dense brownies from overmixing.? Don’t overmix once flour is added, mix just until combined.
- Overbaked, dry brownies.? Check brownies at 25 minutes, as oven times vary.
- Crumbly, uneven slices.? Let brownies cool fully before cutting.

Mummy Brownies
Ingredients
Equipment
Method
- Preheat your oven to 175°C (350°F) and line the baking pan with parchment paper, leaving some overhang for easy lifting.

- Place the dark chocolate and butter in a double boiler or microwave-safe bowl, gently melting and stirring until smooth and glossy, filling your kitchen with a rich chocolate aroma.
- Remove the melted mixture from heat and whisk in the eggs one at a time, ensuring each is well incorporated, and the batter becomes shiny and velvety.
- Add the sugar and vanilla extract, folding them into the batter, which will become thick and glossy, filling your bowl with a sweet, chocolatey scent.
- Sift in the all-purpose flour and a pinch of salt, gently folding until just combined; the batter should be smooth but not overmixed to keep it fudgy.
- Pour the batter into the prepared pan, spreading it evenly with a spatula, creating a smooth, glossy surface that promises a rich, dense crumb.

- Bake in the preheated oven for 25-30 minutes, until the edges are set but the center remains fudgy, and a toothpick inserted in the middle comes out with moist crumbs.
- Remove the pan from the oven, let the brownies cool in the pan for about 10 minutes, then lift them out using the parchment overhang and cool completely on a wire rack for clean slicing.
- Once cooled, cut the brownies into squares, and if you like, decorate to resemble mummies with white icing or chocolate drizzle and tiny candy eyes for a playful finish.
Notes

Welcome to Owning This Stove. I’m so glad you’re here. I’m a food blogger, recipe developer, and storyteller who believes food is one of the most honest ways to understand a place, a person, or a moment in time. This blog is where I collect those moments, from quiet mornings in unfamiliar kitchens to crowded cafés filled with conversation and clinking cups.