Peanut butter smoothies are a staple in my kitchen, but I like to think of them as more than just quick fixes. They’re a chance to really savor that nutty, creamy richness, especially when made with a few thoughtful tweaks. Using frozen bananas, a splash of vanilla, and a dash […]
Beverages
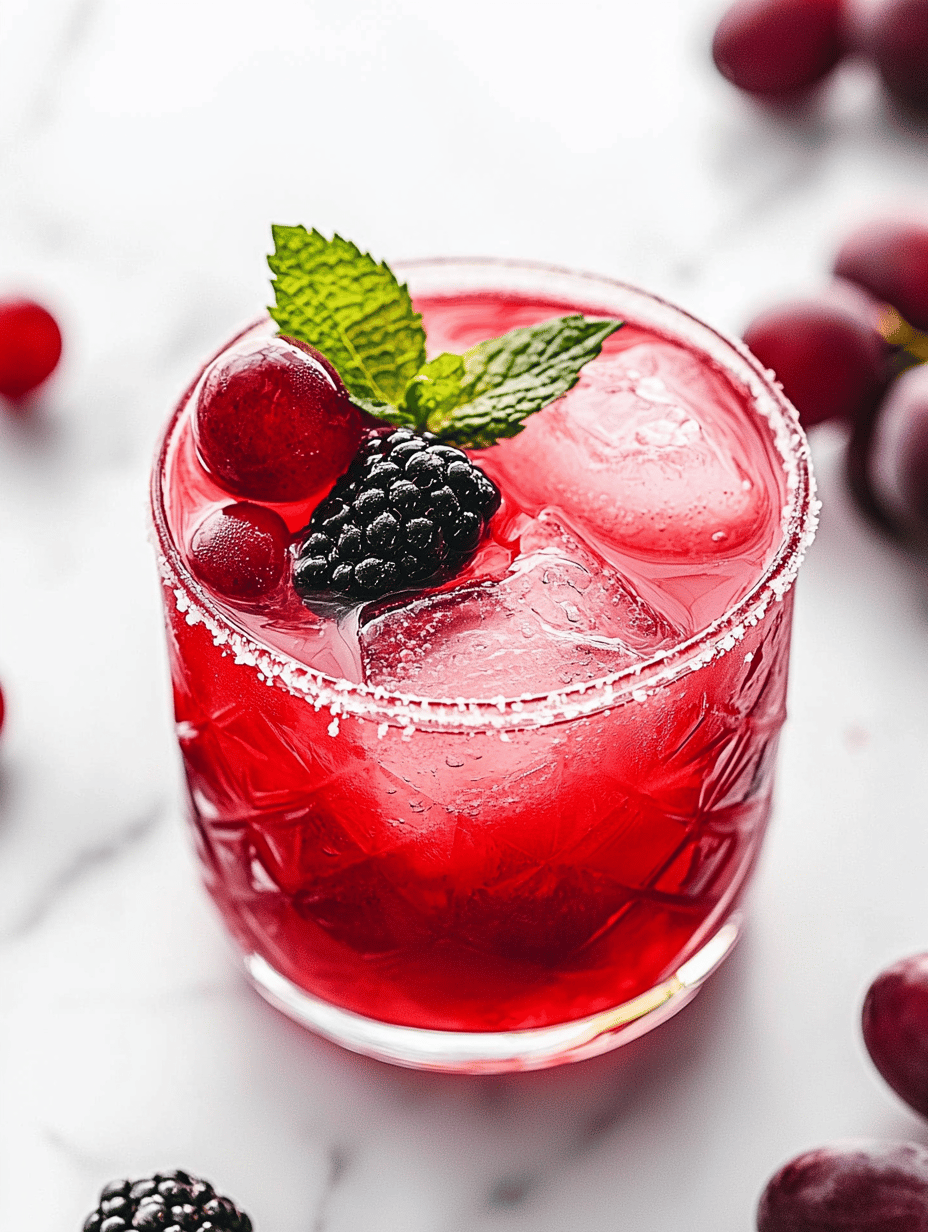
Blood Moon Bash: Vampire Punch for Haunted Hearts
As the leaves turn and autumn whispers its cool secrets, I find myself craving a drink that matches the season’s somber beauty. This Vampire Punch with its vivid red hue perfectly captures that eerie, mesmerizing glow of a blood moon. It’s not just a drink—it’s an experience that stirs both […]
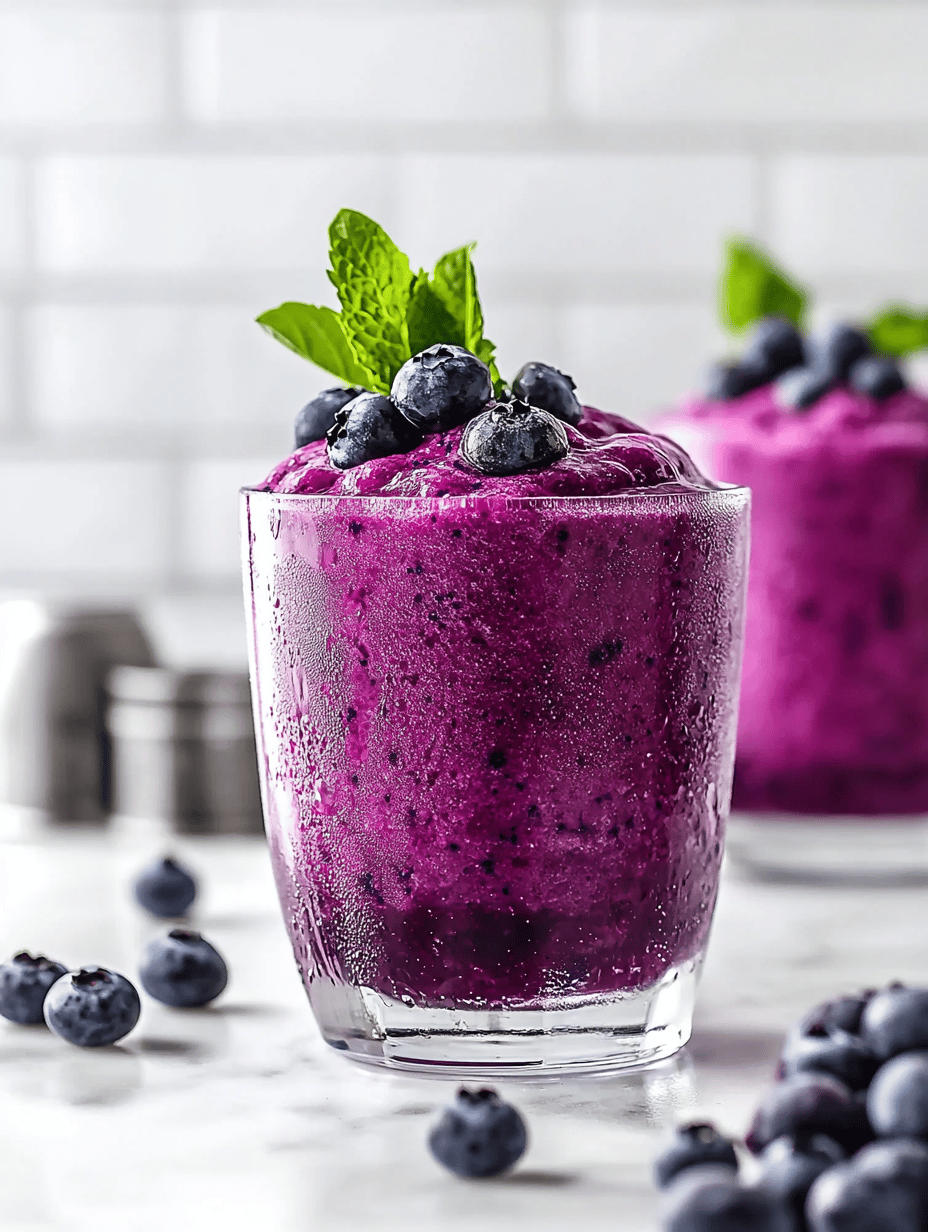
Cool Blue: The Surprising Freshness of a Blueberry Slushie
Imagine someone squeezing the last jewel-toned berries of summer right into your glass. That burst of fresh blueberry aroma instantly transports you to a sun-drenched farmstead, where the air smells of ripe fruit and wildflowers. Making a blueberry slushie is more than blending berries; it’s about capturing that fleeting moment […]
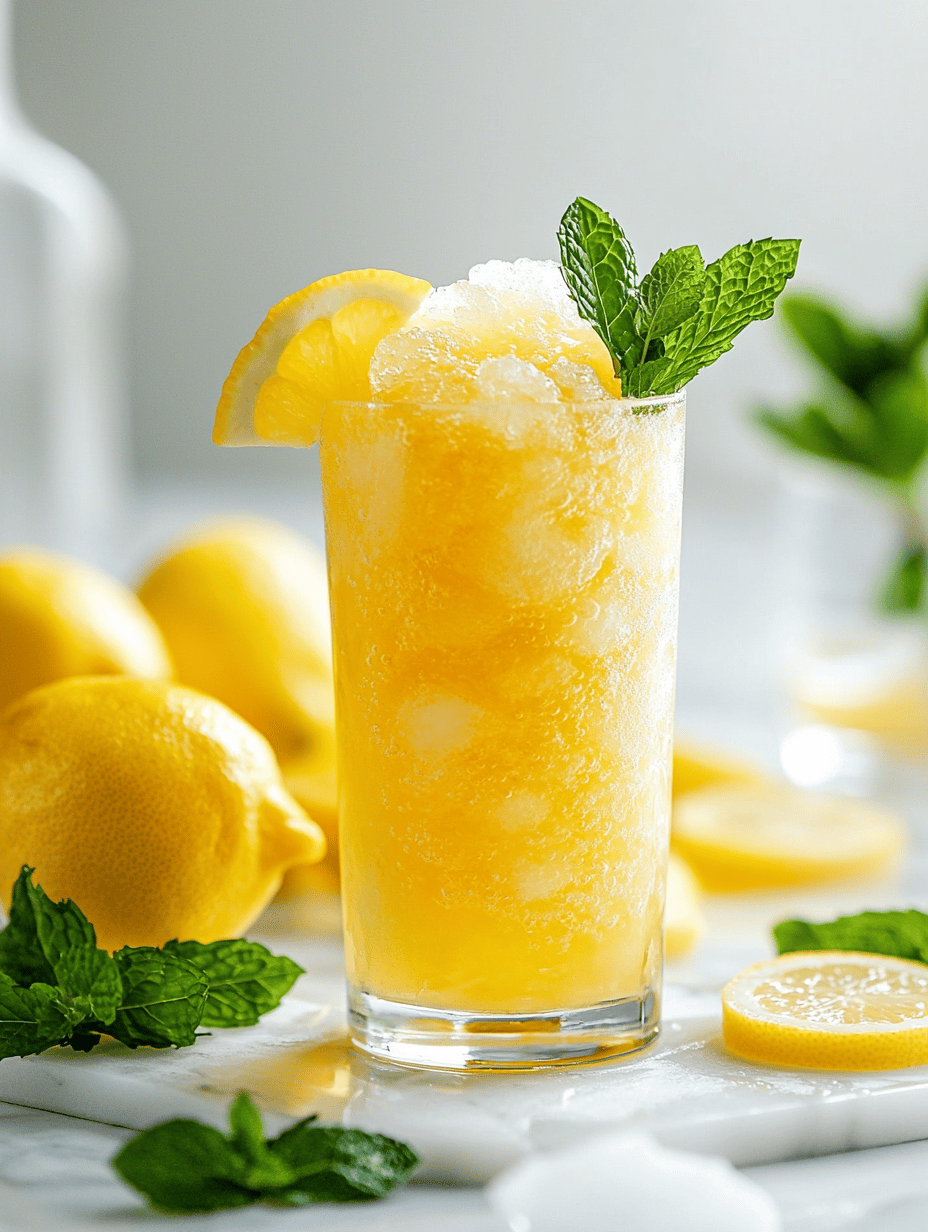
Chill Out with a Lemonade Slushie: The Unexpected Way to Beat the Heat
When summer hits and the sun blazes, I turn to an unconventional treat: the lemonade slushie. It’s not just a frozen drink; it’s a mini-vacation in every icy sip, especially when made with a splash of fresh herbs or a hint of spice. I love how it transforms a simple […]