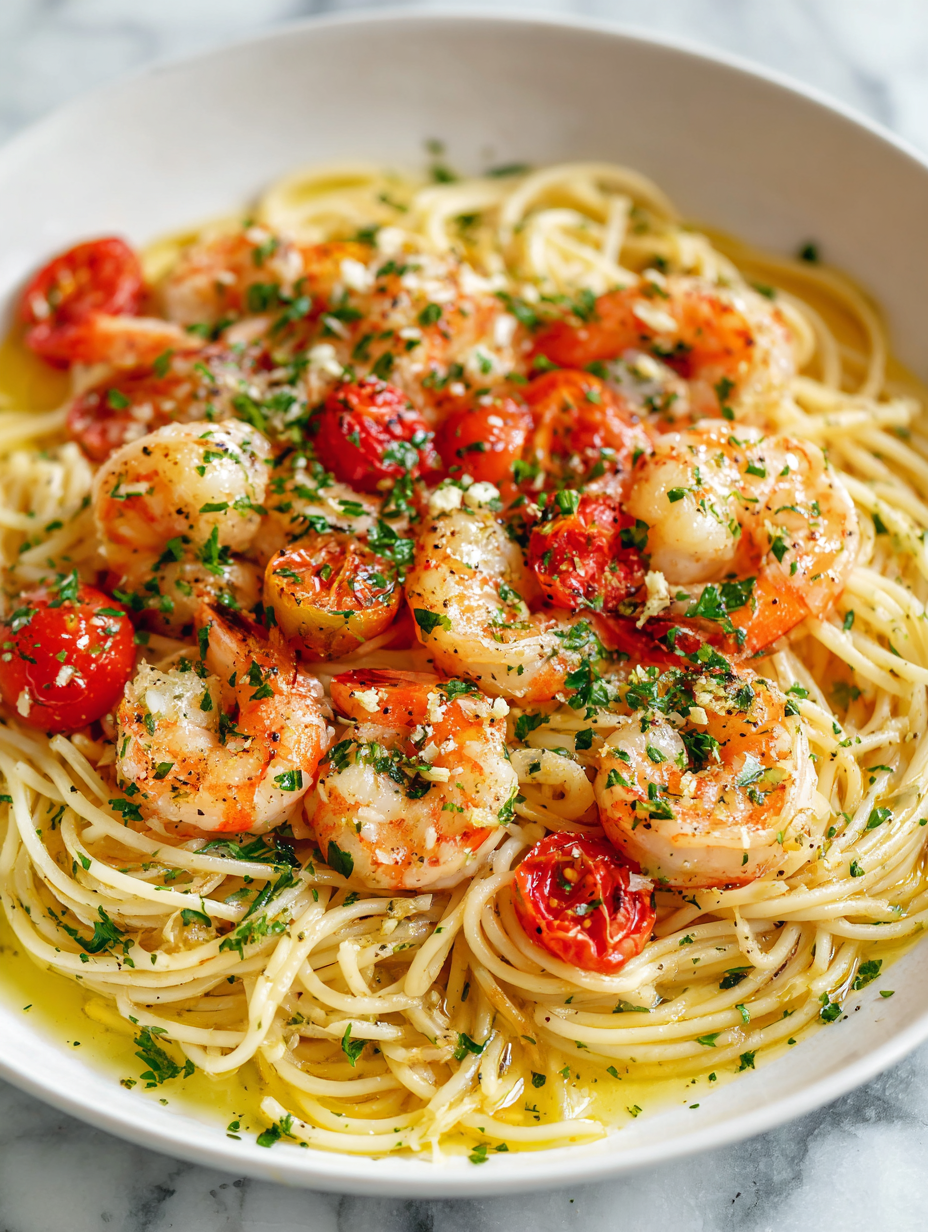
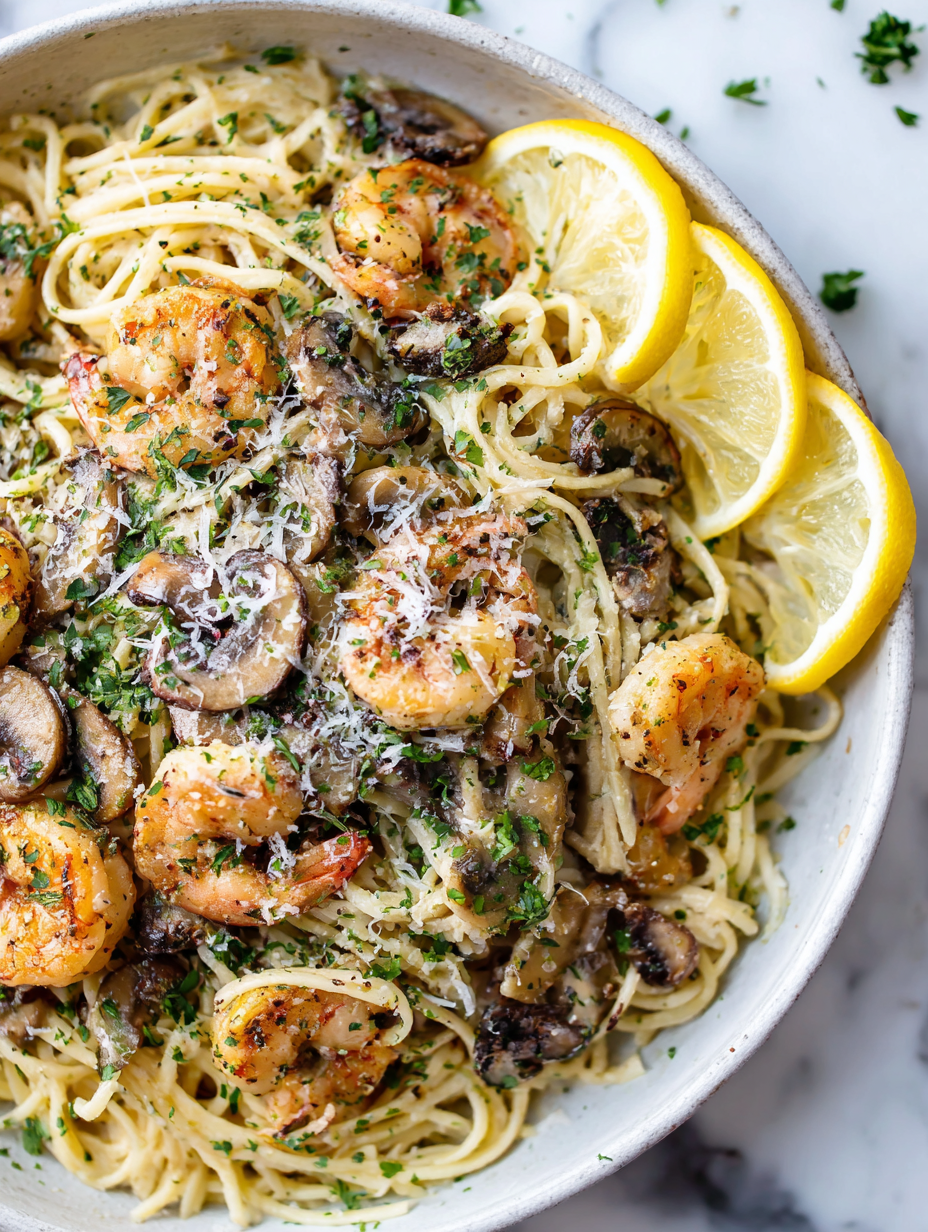
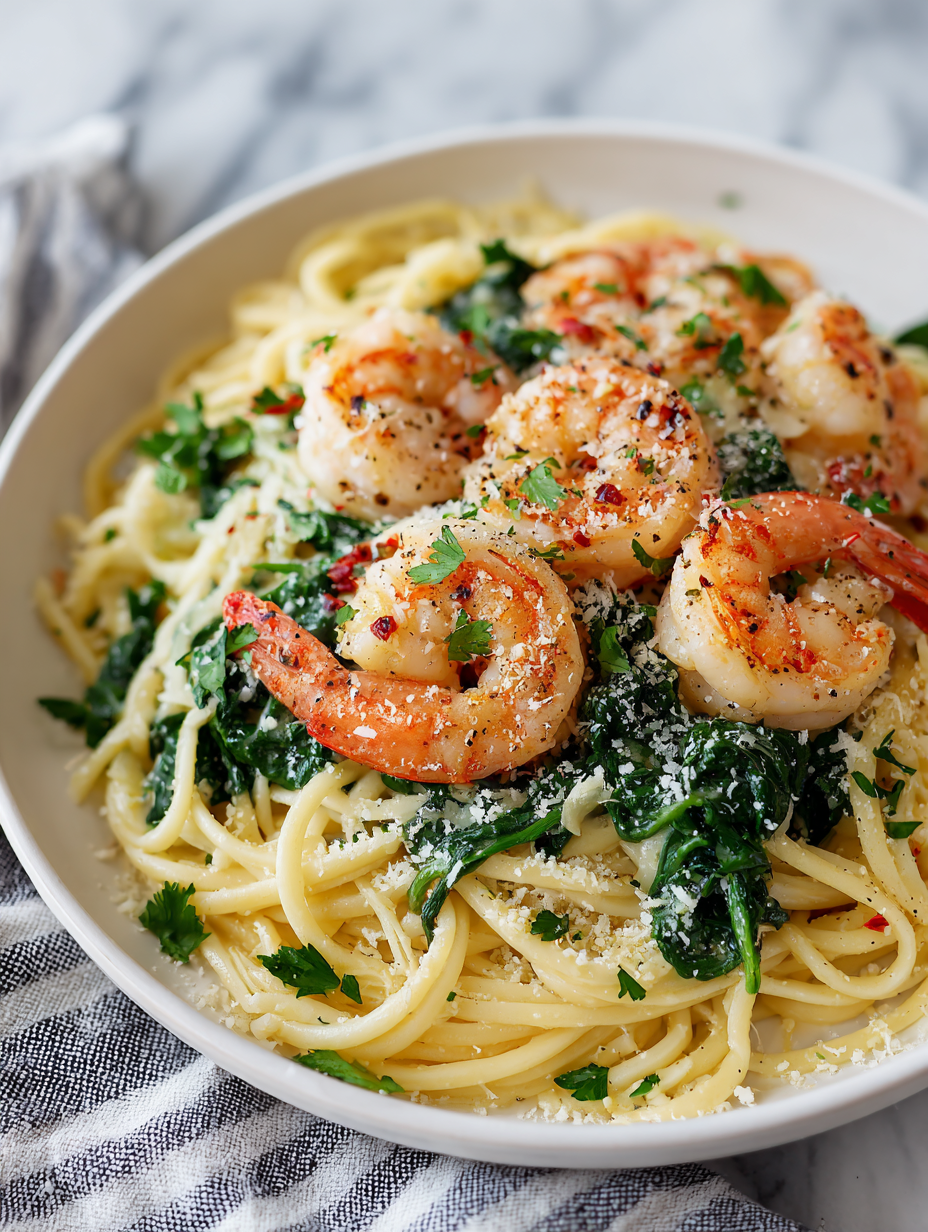
Category: Main Course

  • Bat-Shaped Calzones: A Playful Twist on Classic Comfort

    Bat-Shaped Calzones: A Playful Twist on Classic Comfort

    Decorating food to look like bats isn’t just about aesthetics. It’s about adding a dash of fun and surprise to your table, especially when you’re tired of the same old pizza or calzone. This idea popped into my head last Halloween, and it stuck because everyone loved that little bit of whimsy. Plus, it’s a chance to get creative with fillings and shapes—more than just a snack, it’s a small craft project.

    Why I Keep Making These Bat-Shaped Calzones

    They turn an ordinary meal into a moment of joy. The playful shape sparks smiles, and the savory warmth makes chilly evenings cozier. Plus, they’re surprisingly versatile—fillings can be swapped, shapes personalized. Every batch feels like a little celebration, and that’s why I keep returning to this simple, fun recipe.

    What’s Inside Your Bat Calzones? A Breakdown

    • Pizza dough: My go-to dough is simple, with a chewy texture and just enough stretch. You can swap in pre-made dough, but homemade has that fresh, yeasty aroma.
    • Cheese: I love a smoky gouda or sharp cheddar, but mozzarella melts beautifully and keeps things gooey.
    • Fillings: Whatever you like—ham, mushrooms, spinach, or spicy sausage—just don’t overstuff to keep the seals intact.
    • Egg wash: A beaten egg brushed on before baking gives a shiny, golden surface, making the bats look extra lively.
    • Herbs & spices: A sprinkle of oregano or crushed red pepper adds a bright, aromatic punch to each bite.

    Tools for Shaping and Baking Your Bat Calzones

    • Sharp knife or pizza cutter: To cut out the bat shapes and trim edges neatly.
    • Rolling pin: To flatten dough evenly for consistent baking.
    • Baking sheet and parchment paper: To prevent sticking and ensure even baking.
    • Pastry brush: To brush crusts with egg wash for a shiny finish.

    Crafting the Bat Wings and Baking Perfection

    Step 1: Start by mixing warm water, a pinch of sugar, and yeast. Let it sit until foamy, about 5-7 minutes.

    Step 2: Add flour, salt, and olive oil to the yeast mixture. Knead until smooth and elastic, about 10 minutes.

    Step 3: Cover the dough and let it rise in a warm spot until doubled, around 1 hour.

    Step 4: Preheat your oven to 220°C (430°F).

    Step 5: Divide dough into small balls, then roll each into a thin circle.

    Step 6: Cut out bat-wing shapes from each circle, or shape freehand for a more rustic look.

    Step 7: Fill one side with your favorite fillings—think smoky cheese, ham, or sautéed mushrooms.

    Step 8: Fold over and seal the edges with a pinch or crimping, creating a bat silhouette.

    Step 9: Bake on a parchment-lined baking sheet for 15-20 minutes, until golden brown.

    Step 10: Remove from oven and let cool slightly before serving.

    Baking Tips for Perfect Bats

    • Dough should be smooth and slightly tacky but not sticky.
    • Ensure fillings are not too wet to prevent soggy crust.
    • Watch the oven; they turn golden and crispy in about 15-20 minutes.
    • Seal edges well to keep fillings from escaping during baking.

    Common Baking Mistakes and How to Fix Them

    • Overstuffed calzones.? Use a thinner filling layer to prevent sogginess.
    • Gaps in the crust.? Seal edges tightly with a fork or pinch for a better seal.
    • Undercooked crust.? Bake at a slightly higher temp if crust isn’t crisp enough.
    • Dough pulling back during shaping.? Let dough rest longer if it keeps shrinking when shaping.

    Bat-Shaped Calzones

    These playful bat-shaped calzones are made using a simple homemade dough filled with your favorite cheeses and savory ingredients. The calzones are shaped into bats with wing-like flaps and baked until golden and crispy, creating a fun, whimsical dish perfect for special occasions or playful meals. The final result is a crispy, cheesy treat with a charming silhouette that delights both kids and adults.
    Prep Time 20 minutes
    Cook Time 20 minutes
    Total Time 1 hour 20 minutes
    Servings: 4
    Course: Main Course
    Cuisine: American
    Calories: 250

    Ingredients
      

    • 1 ½ cups all-purpose flour for the dough
    • 1 teaspoon instant yeast activates the dough
    • ½ teaspoon salt
    • ½ cup warm water about 110°F, helps activate yeast
    • 1 tablespoon olive oil
    • 1 cup shredded cheese (mozzarella, cheddar, or gouda) your choice of cheese for filling
    • ½ cup cooked fillings ham, mushrooms, spinach, or sausage optional, choose your favorites
    • 1 egg beaten for egg wash
    • ½ teaspoon dried oregano or red pepper flakes herbs & spices optional, for seasoning

    Equipment

    • Mixing bowl
    • Dough scraper or spatula
    • Rolling pin
    • Baking sheet
    • Parchment paper
    • Pastry brush
    • Sharp knife or pizza cutter

    Method
     

    1. Mix warm water, a pinch of sugar, and yeast in a bowl. Let sit until foamy, about 5-7 minutes — this activates the yeast and gets the dough rising.
    2. Add flour, salt, and olive oil to the yeast mixture and stir until a shaggy dough forms.
    3. Knead the dough on a lightly floured surface for about 10 minutes until it becomes smooth, elastic, and slightly tacky to the touch.
    4. Place the dough in a clean bowl, cover with a damp cloth, and let it rise in a warm spot until doubled in size, about 1 hour.
    5. Preheat your oven to 220°C (430°F) and line a baking sheet with parchment paper.
    6. Divide the dough into 4 equal portions, then roll each into a thin, round disk about 6 inches in diameter with a rolling pin.
    7. Cut out bat-wing shapes from each circle using a sharp knife or pizza cutter, or shape freehand for a rustic look.
    8. Place a spoonful of cheese and optional fillings on one side of each shape, avoiding the edges to keep the seal intact.
    9. Fold the dough over the fillings to create a bat silhouette and pinch or crimp the edges to seal tightly.
    10. Transfer the shaped calzones to the prepared baking sheet, brush the tops with beaten egg for a shiny finish, and sprinkle with herbs or spices if desired.
    11. Bake in the preheated oven for 15-20 minutes until golden brown and crispy, then remove and let cool slightly before serving.

    Notes

    Ensure fillings are not too wet to prevent sogginess. Seal edges well for a perfect shape and to keep fillings inside during baking. For extra crispness, bake slightly longer or at a higher temperature.
    Enjoy these bat-shaped calzones as a fun dinner or party snack. They’re great for kids’ parties or just a whimsical dinner on a chilly evening. Feel free to customize fillings with what you have—spicy sausage, roasted veggies, or even sweet apple and cinnamon work well. Once baked, they’ll look charmingly spooky and taste hearty, with that irresistible crust crunch. Dive in with a smile—there’s something satisfying about bite-sized, playful food.

  • A Cozy Spin on Pumpkin Alfredo Pasta: Comfort in Every Bite

    A Cozy Spin on Pumpkin Alfredo Pasta: Comfort in Every Bite

    Pumpkin Alfredo Pasta might seem like a twist, but it’s a comforting mash-up that’s rooted in the season’s bounty. I love how the pumpkin’s natural sweetness and creaminess melt into a rich, velvety sauce. It’s the kind of dish that feels like a warm hug after a long day, especially when the air turns crisp outside.

    Why I Keep Coming Back to Pumpkin Alfredo

    This dish is my seasonal comfort, a reminder that simple ingredients can make something extraordinary. It’s versatile enough to serve as a weekday dinner or elevate a casual gathering. The blend of roasted pumpkin and creamy sauce just feels like a warm hug that I always crave, especially when the weather turns cooler.

    Breaking Down the Ingredients

    • Pumpkin: Sweet, earthy, and velvety when roasted—use sugar pumpkin or butternut squash for a richer flavor.
    • Heavy cream: Creates that lush, smooth sauce—substitute with coconut cream for dairy-free.
    • Garlic: Adds aromatic depth—don’t skip, even if you’re pressed for time.
    • Parmesan cheese: Salty, umami kick—try Pecorino for a sharper edge.
    • Olive oil or butter: For roasting and sautéing—use good-quality for best flavor.
    • Fresh sage or herbs: Bright, fragrant finish—fresh herbs make all the difference.
    • Salt and pepper: Season to taste—don’t be shy with flavor.

    Tools of the Trade for Pumpkin Alfredo

    • Baking sheet: Roasting pumpkin chunks to bring out their caramelized sweetness.
    • Large pot: Cooking pasta to perfect al dente.
    • Skillet or large frying pan: Making the creamy sauce and melding flavors.
    • Wooden spoon or spatula: Stirring and combining ingredients smoothly.
    • Blender or immersion blender (optional): Pureeing pumpkin for an ultra-smooth sauce.

    Step-by-Step Guide to Creamy Pumpkin Alfredo

    Step 1: Start by roasting the pumpkin. Cut into chunks, toss with olive oil, sprinkle with salt, and roast at 200°C (400°F) for about 25-30 minutes until tender and caramelized.

    Step 2: While pumpkin roasts, cook your pasta. Use a large pot of salted water, bring to a boil, and cook until al dente, about 8-10 minutes.

    Step 3: Make the sauce: In a large skillet, melt butter over medium heat. Add garlic and cook until fragrant, about 1 minute.

    Step 4: Add roasted pumpkin to the skillet, mash slightly, then pour in heavy cream. Simmer for 5-7 minutes until the sauce thickens and is velvety.

    Step 5: Toss the cooked pasta into the sauce. Mix well, season with salt and pepper, and finish with a sprinkle of grated Parmesan.

    Step 6: Serve hot, garnished with fresh sage or a drizzle of good olive oil.

    Cooking Checkpoints and Tips

    • Pumpkin should be deeply caramelized and soft enough to mash easily.
    • Pasta must be cooked al dente—firm to bite, not mushy.
    • Sauce should coat the pasta smoothly, not pool or separate.
    • Taste and adjust seasoning before serving to balance sweetness and salt.

    Common Mistakes and How to Fix Them

    • Sauce is too gloopy and thick.? Add a splash of pasta water to loosen the sauce if it’s too thick.
    • Sauce is burning or sticking to the pan.? Reduce heat and stir constantly to prevent burning or sticking.
    • The sauce tastes flat.? Tweak seasoning with a pinch of nutmeg or more salt.
    • Sauce feels grainy or lumpy.? Ensure pumpkin is fully roasted and soft before blending.

    Creamy Pumpkin Alfredo Pasta

    This dish combines roasted pumpkin with a rich, velvety Alfredo sauce to create a comforting, seasonal pasta. The pumpkin’s natural sweetness and smooth texture blend seamlessly with garlic, cream, and Parmesan, resulting in a luscious, thick sauce that coats al dente pasta beautifully. It’s a warm, inviting meal perfect for crisp fall evenings.
    Prep Time 10 minutes
    Cook Time 40 minutes
    Total Time 50 minutes
    Servings: 4
    Course: Main Course
    Cuisine: Seasonal
    Calories: 550

    Ingredients
      

    • 1 kg sugar pumpkin or butternut squash cut into chunks
    • 2 tablespoons olive oil for roasting
    • 4 cloves garlic minced
    • 1 cup heavy cream
    • 1/2 cup Parmesan cheese grated
    • 2 tablespoons butter
    • 1 teaspoon fresh sage or herbs chopped, for garnish
    • Salt and pepper to taste
    • 400 g pasta (penne, fettuccine, or your favorite) cooked al dente

    Equipment

    • Baking sheet
    • Large pot
    • Skillet or large frying pan
    • Wooden spoon or spatula
    • Blender or immersion blender (optional)

    Method
     

    1. Preheat your oven to 200°C (400°F). Toss pumpkin chunks with olive oil and a pinch of salt, then spread them evenly on a baking sheet. Roast for 25-30 minutes until the pumpkin is deeply caramelized and tender when pierced with a fork.
    2. While the pumpkin roasts, bring a large pot of salted water to a boil. Cook your pasta until just al dente, about 8-10 minutes, then drain and set aside.
    3. In a large skillet, melt the butter over medium heat. Add the minced garlic and sauté for about 1 minute until it becomes fragrant and slightly golden.
    4. Add the roasted pumpkin to the skillet. Use a spatula or spoon to mash it slightly, breaking it into smaller pieces as it heats through, filling your kitchen with a sweet, roasted aroma.
    5. Pour in the heavy cream and stir everything together. Bring the mixture to a gentle simmer, then cook for 5-7 minutes, stirring occasionally, until the sauce thickens to a velvety consistency.
    6. Use an immersion blender to blend the sauce until smooth, or transfer it carefully to a blender and puree until silky. Return it to the skillet if needed.
    7. Add the grated Parmesan cheese to the sauce, stirring until melted and fully incorporated. Season with salt and pepper to taste, balancing the sweetness of the pumpkin.
    8. Combine the cooked pasta with the pumpkin Alfredo sauce, tossing gently to coat every strand or piece thoroughly. The sauce should cling nicely to the pasta, creating a creamy, beautiful dish.
    9. Plate the pasta and garnish with freshly chopped sage or herbs, adding a fragrant, bright touch to the rich dish. Drizzle a little olive oil if desired for extra shine and flavor.
    10. Serve the creamy pumpkin Alfredo hot, enjoying the comforting blend of sweet roasted pumpkin and savory cheese with every bite.

    Notes

    For a dairy-free version, substitute coconut cream for heavy cream and use a dairy-free cheese alternative. To add a bit of heat, sprinkle red pepper flakes on top before serving.
    This dish is a little pumpkin patch in your bowl—sweet, earthy, and ridiculously creamy. It’s perfect for cozy nights or when you want to impress without fuss. Feel free to swap in a splash of nutmeg or a handful of toasted pecans for a personal touch. Keep it simple, keep it hearty, and enjoy every spoonful.

  • Jack O’ Lantern Burgers: A Playful Twist on Autumn Classics

    Jack O’ Lantern Burgers: A Playful Twist on Autumn Classics

    These Jack O’ Lantern Burgers are more than just a Halloween party snack. They’re a playful way to bring a fall flavor punch into your weeknight dinners, blending sweet roasted pumpkin with hearty beef. There’s a nostalgic charm to carving pumpkins, but this recipe turns that fun into a savory, satisfying meal. It’s about embracing the season with a little bit of chaos and a lot of flavor.

    Why I Keep Making These Burgers

    They capture the fall spirit perfectly, blending comfort with fun. The smoky sweetness of pumpkin makes every bite memorable. Plus, they’re a conversation starter—who wouldn’t want to see a burger dressed like a mini pumpkin?

    Ingredients Breakdown & Substitutes

    • Pumpkin: Roasted pumpkin adds a sweet, earthy flavor and moist texture. Swap with roasted sweet potato for a similar sweetness.
    • Ground Beef: Juicy and flavorful, essential for the burger. Use turkey or plant-based patties if preferred.
    • Cheese: Melted cheese like cheddar or Monterey Jack ties it all together. Vegan cheese works if you want dairy-free.
    • Burger Buns: Soft buns provide the perfect cradle. Brioche adds a touch of richness, but regular sesame buns work fine.
    • Cranberry Sauce: Adds a tart, festive note. Orange marmalade can be a tangy alternative.
    • Spicy Mustard: Gives a punch of sharpness. Dijon is classic, but honey mustard adds sweetness.
    • Crispy Lettuce: Fresh crunch balances the richness. Arugula offers a peppery kick.

    Tools & Equipment for Perfect Jack O’ Lantern Burgers

    • Grill or Cast-Iron Skillet: To cook the burgers evenly with a good sear.
    • Baking Sheet: For roasting the pumpkin.
    • Mixing Bowls: To mash pumpkin and prepare burger mixture.
    • Spatula: To flip the patties.
    • Toothpick or Skewer: To check burger doneness if needed.

    Step-by-step to Pumpkin-Infused Autumn Burgers

    Step 1: Preheat your grill or cast-iron skillet to medium-high, about 200°C (390°F).

    Step 2: Slice the pumpkin in half, scoop out seeds, and roast until soft, about 25 minutes at 200°C (390°F).

    Step 3: While pumpkin roasts, form your beef patties, seasoning generously with salt, pepper, and a pinch of smoked paprika.

    Step 4: Once pumpkin is cool enough to handle, mash it well and set aside.

    Step 5: Cook your patties for about 4 minutes per side, until a nice crust forms and internal temp reaches 70°C (160°F).

    Step 6: In the last minute, add slices of cheese, letting them melt over the patties.

    Step 7: Toast burger buns lightly on the grill until golden, about 1-2 minutes.

    Step 8: Assemble the burgers: spread a bit of spicy mustard on the buns, layer the beef patty, roasted pumpkin, and a handful of crispy lettuce.

    Step 9: Finish with a dollop of cranberry sauce or a smear of chipotle mayo for that extra zing.

    Cooking Checkpoints & Tips for Jack O’ Lantern Burgers

    • Pumpkin should be roasted until soft and slightly caramelized for the best flavor.
    • Patties should have a good crust and reach 70°C (160°F) internally.
    • Cheese melts quickly; add it in the last minute of cooking.
    • Buns should be toasted until golden but not burnt for the perfect crunch.

    Common Mistakes & How to Fix Them

    • Not enough flavor in the beef.? UNDERSALTED THE PATTIES? Add more seasoning before cooking.
    • Pumpkin mixture is watery.? PUMPKIN TOO WET? Drain excess moisture or mash thoroughly to avoid soggy burgers.
    • Overcooking or burning the buns.? BURGER BURNS? Lower heat slightly or toast buns separately to prevent burning.
    • Cheese remains unmelted.? CHEESE NOT MELTING? Cover the skillet or grill for a minute longer.

    Jack O’ Lantern Burgers

    These playful burgers combine roasted pumpkin and hearty ground beef to create a fall-inspired meal with a juicy interior and a slightly caramelized, flavorful crust. Topped with melted cheese and festive cranberry sauce, they offer a fun and satisfying way to celebrate the season. The buns are toasted to golden perfection, completing this visually striking dish.
    Prep Time 15 minutes
    Cook Time 30 minutes
    Total Time 45 minutes
    Servings: 4
    Course: Main Course
    Cuisine: American
    Calories: 550

    Ingredients
      

    • 1 small pumpkin halved and seeded
    • 500 g ground beef or turkey / plant-based alternative
    • 4 slices cheddar cheese or Monterey Jack
    • 4 buns burger buns brioche or sesame
    • 4 tablespoons cranberry sauce or orange marmalade
    • 2 teaspoons spicy mustard Dijon or honey mustard
    • 1 head lettuce crispy or arugula
    • 1 tablespoon olive oil for roasting pumpkin
    • to taste salt and pepper for seasoning

    Equipment

    • Oven
    • Baking sheet
    • Mixing bowls
    • Grill or Cast-Iron Skillet
    • Spatula
    • Toothpick or Skewer

    Method
     

    1. Preheat your oven to 200°C (390°F). Slice the pumpkin in half, scoop out the seeds, and place it cut-side down on a baking sheet drizzled with olive oil. Roast until soft and caramelized, about 25 minutes, until the flesh is tender when pierced with a fork.
    2. While the pumpkin roasts, form the ground beef into four evenly sized patties. Season generously with salt, pepper, and a pinch of smoked paprika if you like. Set aside.
    3. Once the pumpkin is cool enough to handle, scoop out the flesh and mash it well in a bowl until smooth. Drain any excess moisture to prevent sogginess in the burgers.
    4. Heat your grill or cast-iron skillet over medium-high heat. Cook the beef patties for about 4 minutes per side, until they develop a nice crust and reach an internal temperature of 70°C (160°F).
    5. During the last minute of cooking, place a slice of cheese on each patty and cover briefly to let it melt into a gooey layer.
    6. While the patties finish, slice the buns and lightly toast them on the grill until golden and crisp, about 1-2 minutes.
    7. Spread a tablespoon of spicy mustard on the bottom buns. Layer each burger with a beef patty, a generous spoonful of roasted pumpkin, and a handful of crispy lettuce.
    8. Top each burger with a dollop of cranberry sauce or a smear of orange marmalade for a festive touch. Cover with the top bun and press gently to hold everything together.
    9. Serve immediately with your favorite sides and enjoy the fun, fall-inspired flavors of these hearty, colorful burgers!

    Notes

    Ensure the pumpkin is well drained after roasting to keep the burger mixture from becoming too watery. Feel free to customize toppings to suit your taste, like adding caramelized onions or spicy jalapeños.
    These burgers are a messy, joyful experiment in blending sweet roasted pumpkin with savory beef. They remind me of carving pumpkins as a kid—fun, a little chaotic, and totally worth every bite. Play around with toppings or spice levels to make them your own. Just don’t forget to enjoy the process and the flavors that come with it.

  • Mummy Hot Dogs: A Nostalgic Twist with a Savory Secret

    Mummy hot dogs are my go-to for kids’ parties or a quick, fun snack that doesn’t require much fuss. It’s a recipe that’s rooted in childhood memories but tweaked for adult tastes with a crispy, flaky twist. I love how the smell of baking pastry fills the house, promising treats to come. It’s a playful food that sparks joy at every bite.

    Why I Keep Coming Back to This Recipe

    These hot dogs are simple, nostalgic, and endlessly customizable. The crispy pastry contrasts beautifully with the juicy sausage, offering a satisfying crunch and savory burst. They’re perfect for when I need a quick, fun snack that looks impressive. Plus, they remind me of childhood parties and lazy weekends, making every bite a little trip back in time.

    Breaking Down the Ingredients

    • Hot dogs: The star, juicy and savory, perfect for wrapping.
    • Puff pastry: Flaky and buttery, adds a crispy crunch. Swap with crescent roll dough for a softer bite.
    • Egg wash: Gives a shiny, golden finish. Use milk for a softer look, or skip for a matte surface.
    • Mustard (optional): A tangy dip that cuts through the richness. Ketchup works too, if you prefer sweeter.
    • Sesame seeds (optional): Adds a nutty flavor and crunch, sprinkle before baking for extra texture.

    Essential Tools for Perfect Mummy Hot Dogs

    • Baking sheet: To hold the wrapped hot dogs during baking.
    • Parchment paper: Prevents sticking and makes cleanup easier.
    • Pastry brush: To apply egg wash for a shiny finish.
    • Sharp knife: To cut pastry cleanly and evenly.
    • Cooling rack: Allows hot dogs to rest without sogginess.

    Step-by-step to Mummy Hot Dogs — The Fun, Fluffy, and Crispy Way

    Step 1: Preheat your oven to 200°C (392°F).

    Step 2: Line a baking sheet with parchment paper.

    Step 3: Wrap each hot dog in a thin slice of puff pastry, sealing the edges with a little beaten egg.

    Step 4: Place the wrapped hot dogs seam-side down on the baking sheet.

    Step 5: Brush the tops with egg wash for a shiny, golden finish.

    Step 6: Bake for 15-20 minutes, until the pastry is puffed and golden.

    Step 7: Remove from oven and let rest for 5 minutes before serving.

    Cooking Tips & Tricks for Mummy Hot Dogs

    • Ensure the pastry is well sealed to prevent it from unwrapping during baking.
    • Watch the oven closely; pastry can go from golden to burnt quickly.
    • Use a sharp knife to make clean, even cuts for wrapping the pastry.
    • Check that the sausages are hot and cooked through before baking.
    • Baste with egg wash generously for a shiny, professional look.

    Common Mistakes & How to Fix Them

    • Pastry unravels during baking.? Seal pastry edges well to prevent unwrapping.
    • Over-browning or undercooking the pastry.? Watch for golden pastry, not burnt edges.
    • Ragged pastry wrapping.? Use a sharp knife for clean cuts.
    • Cold or raw sausages inside.? Ensure sausages are fully cooked before wrapping.

    Mummy Hot Dogs

    Mummy hot dogs are a fun, nostalgic snack featuring juicy sausages wrapped in flaky puff pastry to resemble little mummies. The pastry crisps up golden and crunchy during baking, creating a playful yet satisfying treat perfect for kids’ parties or quick snacks. The combination of tender sausage and crispy pastry makes each bite both savory and delightful.
    Prep Time 10 minutes
    Cook Time 20 minutes
    Total Time 30 minutes
    Servings: 8
    Course: Main Course
    Cuisine: American
    Calories: 250

    Ingredients
      

    • 8 pieces hot dogs juicy and fully cooked
    • 1 package puff pastry thawed if frozen
    • 1 egg egg beaten, for egg wash
    • optional mustard for dipping
    • optional tablespoon sesame seeds for sprinkling on pastry before baking

    Equipment

    • Baking sheet
    • Parchment paper
    • Pastry brush
    • Sharp knife
    • Cooling rack

    Method
     

    1. Preheat your oven to 200°C (392°F) and line a baking sheet with parchment paper.
    2. Unroll the puff pastry on a clean surface and cut it into strips approximately 1 inch wide and long enough to wrap around each hot dog.
    3. Place a hot dog on the end of a pastry strip and gently wrap the pastry around it, leaving space at one end to resemble a mummy’s head. Seal the edges with a little beaten egg if needed.
    4. Repeat with all hot dogs, arranging them seam-side down on the prepared baking sheet.
    5. Brush the tops of the pastry-wrapped hot dogs with the beaten egg to give them a shiny, golden finish. Sprinkle with sesame seeds if desired for added crunch and flavor.
    6. Bake in the preheated oven for 15-20 minutes, or until the pastry is puffed up and golden brown, filling the kitchen with a buttery aroma.
    7. Remove from the oven and let rest on a cooling rack for about 5 minutes, allowing the pastry to set and cool slightly.
    8. Serve warm with mustard or your favorite dipping sauce for a fun and satisfying snack that’s crispy on the outside and juicy inside.

    Notes

    Ensure the pastry edges are well sealed to prevent unwrapping during baking. Using a sharp knife helps make clean cuts. Keep an eye on the pastry in the oven to prevent over-browning.
    These mummy hot dogs are more than just a fun snack—they’re a nostalgic burst of childhood wrapped in crispy pastry. The savory sausage, encased in flaky bread, is a perfect easy appetizer or party finger food. Feel free to tweak the spices or add a drizzle of mustard for an extra zing. They’re simple enough to whip up on a whim but charming enough to serve with pride.

  • Gooey Ghoulish Feast: Bloody Spaghetti with Sizzling Sausage Fingers

    Gooey Ghoulish Feast: Bloody Spaghetti with Sizzling Sausage Fingers

    Hovering between playful horror and cozy comfort, this Halloween dish turns your dinner into a fun spectacle. The sight of squishy, blood-red spaghetti tangled with sausage fingers sparks both giggles and shudders at the table. It’s as much about the eerie visual as the smoky, savory aroma that beckons you.

    Using common ingredients, this recipe transforms a simple pasta night into a thrilling culinary adventure. Perfect for kids’ parties or a spooky-themed movie night, it encourages messier, more relaxed eating—because what’s Halloween without a little chaos? Prepare for a burst of flavor that’s as haunting as it is satisfying.

    Blood-Red Spaghetti with Sausage Fingers

    This spooky pasta dish features red-colored spaghetti that resemble gory tendrils, tangled with savory sausage pieces shaped like fingers. The dish is cooked using boiling and sautéing methods, resulting in a slightly chewy, saucy final texture with a vibrant, eerie appearance perfect for Halloween celebrations.
    Prep Time 15 minutes
    Cook Time 20 minutes
    Total Time 35 minutes
    Servings: 4
    Course: Main Course
    Cuisine: Horror-themed
    Calories: 520

    Ingredients
      

    • 12 oz spaghetti preferably dyed red with food coloring
    • 4 links sausages preferably Italian sausage for flavor
    • 2 tbsp olive oil
    • 3 cloves garlic minced
    • 1 cup tomato sauce or marinara sauce
    • to taste salt and pepper

    Equipment

    • Large pot
    • Skillet or frying pan
    • Cooking spoon
    • Measuring cups and spoons

    Method
     

    1. Bring a large pot of water to a boil, then add a generous pinch of salt and the red-colored spaghetti. Cook according to package instructions until al dente, then drain and set aside.
    2. While the pasta cooks, slice each sausage link into four equal pieces and shape some of the pieces into finger-like structures, tapering one end to resemble a knuckle.
    3. Heat olive oil in a skillet over medium heat, then add the sausage fingers. Cook for about 4-5 minutes until browned and cooked through, turning occasionally to get even charring.
    4. Add the minced garlic to the skillet and cook for 30 seconds until fragrant, hearing a gentle sizzle and smelling the aroma of garlic.
    5. Pour in the tomato sauce and stir to coat the sausage fingers evenly. Let the sauce simmer for about 5 minutes, allowing flavors to meld and the sauce to thicken slightly.
    6. Transfer the cooked, drained spaghetti into the skillet with the sauce, tossing gently to coat all strands and enhance their blood-red appearance.
    7. Arrange the blood-red spaghetti on a serving plate and top with the spooky sausage fingers, making them appear like sinister, bloodied appendages ready to attack.

    Notes

    For extra creepiness, add green or black food coloring to the sauce or garnish with fake cobwebs and plastic spiders.

    Crafting this gory masterpiece is surprisingly easy, making it a perfect project for a spooky weekend. The burst of tangy tomato sauce against the richness of the sausage creates a balanced, bold flavor that complements the fun visuals. Plus, it leaves everyone reminiscing about childhood costume parties with a messy, flavorful twist.

    As autumn air thickens with the scent of leaves and spices, this dish fits right into the seasonal feast. It’s a playful way to celebrate Halloween, with a plate full of chaos and comfort. Truly, a trick and a treat in one fiery, pasta-laden package.

  • Spooky, Surprising Halloween Eyeball Pasta: A Sock Puppet of a Dish!

    Spooky, Surprising Halloween Eyeball Pasta: A Sock Puppet of a Dish!

    Halloween dinner ideas often lean towards the creepy, but this Eyeball Pasta takes it into unexpected territory. It’s like dinner theater on your plate, where each meatball wears its own tiny eyeball made of cheese and olives. The smell of garlic and baked meatballs mixing with the crispy pasta edges is oddly comforting, yet delightfully unsettling.

    This recipe isn’t just fun; it’s a visual surprise that gets everyone talking. Assembling the “eyeballs” gives a little chaos and pride to the process, especially when you see the kids’ eyes widen with glee. It’s a perfect blend of spooky aesthetics and hearty, satisfying pasta that makes every bite memorable.

    Eyeball Pasta

    This dish features baked meatballs embedded with cheese and olives to resemble eyeballs, served over crispy pasta. The pasta is baked until edges are golden and slightly crunchy, with meatballs roasted to a juicy interior, and the eyeballs made visually striking with cheese and olive accents. The final presentation combines hearty textures with playful, spooky elements.
    Prep Time 20 minutes
    Cook Time 30 minutes
    Total Time 50 minutes
    Servings: 4
    Course: Main Course
    Cuisine: American
    Calories: 620

    Ingredients
      

    • 400 grams spaghetti pasta uncooked
    • 500 grams ground beef for meatballs
    • 1 cup breadcrumbs for binding
    • 1 large egg to help hold meatballs together
    • 2 cloves garlic minced
    • 1 cup shredded mozzarella cheese for eyeballs
    • 10 pitted green olives for eyeballs
    • 2 tablespoons olive oil for coating and baking
    • 2 teaspoons dried oregano seasoning for meatballs
    • 1 teaspoon salt for seasoning
    • 0.5 teaspoon black pepper for seasoning

    Equipment

    • Baking sheet
    • Large mixing bowl

    Method
     

    1. Preheat your oven to 400°F (200°C) and bring a large pot of salted water to a boil. Cook the spaghetti until al dente, then drain and set aside.
    2. In a large mixing bowl, combine the ground beef, breadcrumbs, egg, minced garlic, oregano, salt, and pepper. Mix everything together until well integrated, creating a flavorful meat mixture.
    3. Shape the mixture into small, uniform meatballs, about 1 inch in diameter, and place them on a baking sheet lined with parchment paper.
    4. Bake the meatballs in the preheated oven for about 20 minutes, until they are cooked through and slightly browned on the outside.
    5. While the meatballs bake, prepare your eyeballs by slicing the olives in half and inserting small pieces of cheese into the hollows to resemble pupils. Set aside.
    6. Once the meatballs are done, let them cool slightly, then carefully press an olive with cheese into the top of each meatball to create the eyeball effect.
    7. Toss the cooked pasta with olive oil, spreading it evenly on a baking sheet. Bake for 10-12 minutes, until edges are crispy and golden brown.
    8. Arrange the crispy pasta on a serving platter or individual plates. Top with the baked meatballs arranged to resemble a spooky, eyeball-themed presentation.
    9. Optional: Garnish with additional herbs or a drizzle of olive oil for extra flavor and visual appeal.
    10. Enjoy your creepy yet hearty Eyeball Pasta, perfect for Halloween dinner fun!
    As you gather around your Halloween table, the Eyeball Pasta makes a playful centerpiece that sparks giggles and cheers. It’s a reminder that food can be both fun and delicious, especially when crafted with a dash of imagination. This dish is great for those last-minute spooky dinners or a surprise twist during a weekend movie night.

    Enjoy the process, and don’t forget to take a moment to appreciate its quirky charm. With fall in the air and ghosts of Halloween past whispering, this pasta offers a perfect blend of festive spirit and comfort food, all served up with a side of laughter.

  • The Cozy Art of Reinventing Chicken Noodle Soup with a Twist

    The Cozy Art of Reinventing Chicken Noodle Soup with a Twist

    Sometimes, chicken noodle soup gets a bad rap as a comfort food everyone takes for granted. I decided to challenge that by adding a touch of unexpected zest—a splash of lemon and a hint of fresh herbs—that elevates it from simple to spectacular. The aroma of simmering broth with a citrusy lift can transform a gloomy day into a bright one.

    Each spoonful delivers a melody of flavors: tender chicken, al dente noodles, and a burst of fresh herbs dancing on your palate. This isn’t just about nostalgia; it’s about giving a well-loved classic a new life. The secret lies in the tiniest tweaks that make a huge difference in flavor and feel.

    Lemon Herbed Chicken Noodle Soup

    This chicken noodle soup is prepared by simmering tender chicken in a flavorful broth, adding al dente noodles and fresh herbs. A splash of lemon brightens the soup, creating a final dish with a clear, comforting appearance and a well-balanced texture of juicy chicken, tender noodles, and aromatic herbs.
    Prep Time 15 minutes
    Cook Time 30 minutes
    Total Time 45 minutes
    Servings: 4
    Course: Main Course
    Cuisine: American
    Calories: 320

    Ingredients
      

    • 1 lb boneless, skinless chicken breasts preferably fresh
    • 8 cups chicken broth
    • 2 cups egg noodles or your preferred pasta
    • 2 tbsp olive oil
    • 3 cloves garlic minced
    • 1 medium onion chopped
    • 1 cup carrots diced
    • 2 stalks celery chopped
    • 1 lemon lemon zested and juiced
    • 1/4 cup fresh parsley chopped
    • 0.5 teaspoon fresh thyme chopped
    • to taste salt and pepper

    Equipment

    • Large Stockpot
    • Wooden Spoon

    Method
     

    1. Heat the large stockpot over medium heat and add the olive oil. Once shimmering, add the chopped onion, carrots, and celery. Sauté for about 5 minutes until the vegetables soften and become fragrant.
    2. Add the minced garlic to the pot and cook for another minute until it releases a strong, inviting aroma.
    3. Place the chicken breasts into the pot and pour in the chicken broth, bringing the mixture to a gentle boil.
    4. Reduce the heat to low, cover the pot, and let the chicken simmer for about 15 minutes until cooked through and tender.
    5. Remove the chicken from the broth and transfer it to a cutting board to cool slightly. While it cools, increase the heat to bring the broth back to a gentle simmer.
    6. Shred the cooled chicken into bite-sized pieces and return it to the simmering broth. Add the chopped parsley, thyme, lemon zest, and a squeeze of lemon juice for brightness.
    7. Stir in the egg noodles and cook for about 8 minutes until tender and cooked through, stirring occasionally to prevent sticking.
    8. Taste the soup and season with salt, pepper, and more lemon juice if desired. The soup should be flavorful, with a fresh citrus aroma.
    9. Once the noodles are tender and the flavors meld together, remove the soup from heat and ladle into bowls.
    10. Garnish with additional chopped parsley and a wedge of lemon for serving, if desired. Enjoy this bright and comforting chicken noodle soup.

    In times when quick comfort food is needed without sacrificing freshness, this revamped chicken noodle soup shines. It’s perfect for cozy weekends or when you want nourishing warmth in a bowl with a little more zing. The vibrant flavors remind me that even the simplest dishes hold endless potential for excitement.

    This recipe also offers a chance to get creative with what’s in your pantry—any leftover veggies or herbs can brighten it further. It’s a reminder that cooking is an act of love and innovation, even in the smallest kitchen moments. Enjoy each spoonful, knowing you made something both comforting and uniquely yours.

  • Spooky Fun! Perfectly Creepy Halloween Mummy Pizza

    Spooky Fun! Perfectly Creepy Halloween Mummy Pizza

    Halloween is the perfect excuse to indulge in playful, spooky foods. But instead of boring pumpkin shapes, why not craft something with a little more chaos—like this Halloween Mummy Pizza? Its gooey cheese eyes and crispy, bandage-like pepperoni strips turn a simple pie into a whimsical monster, perfect for kids and adults alike.

    What makes this pizza stand out is the fun of decorating it. Creating the mummy’s wrappings with different toppings turns dinner into a delightful craft. Plus, it’s a feast for the senses—crunchy crust, savory cheese, and smoky pepperoni all in one spooky delight.

    Halloween Mummy Pizza

    This Halloween-themed pizza features a crispy crust topped with gooey cheese and decorated with pepperoni strips to resemble a spooky mummy. The cheese is melted and bubbly, with pepperoni arranged to look like bandages and eyes, creating a playful, spooky appearance.
    Prep Time 15 minutes
    Cook Time 15 minutes
    Total Time 30 minutes
    Servings: 4
    Course: Main Course
    Cuisine: American
    Calories: 280

    Ingredients
      

    • 1 blank store-bought pizza dough about 12 inches diameter
    • 1 cup cup shredded mozzarella cheese for topping
    • 50 grams pepperoni slices for bandages
    • 2 pieces white cheese or mozzarella balls for eyes
    • 2 pieces black olives for pupils
    • 1 tbsp olive oil to brush crust

    Equipment

    • Baking sheet
    • Parchment paper
    • Rolling pin
    • Oven
    • Kitchen scissors or knife

    Method
     

    1. Preheat your oven to 450°F (230°C) and line a baking sheet with parchment paper.
    2. Roll out the pizza dough into a 12-inch circle on a lightly floured surface, then transfer it to the prepared baking sheet.
    3. Brush the crust lightly with olive oil to promote browning and add a subtle shine.
      1 blank store-bought pizza dough
    4. Sprinkle the shredded mozzarella evenly over the dough, leaving a small border at the edges for the crust.
      1 blank store-bought pizza dough
    5. Arrange the slices of pepperoni across the surface in irregular, bandage-like strips, covering most of the cheese area for a chaotic look.
      1 blank store-bought pizza dough
    6. Bake in the preheated oven until the crust is golden and cheese is bubbling, about 12-15 minutes.
    7. While the pizza bakes, cut the mozzarella cheese into small round balls to create eyes, and slice black olives for pupils.
      1 blank store-bought pizza dough
    8. Once baked, remove the pizza from the oven and let it cool for a minute.
    9. Place the cheese eyes on the pizza, then use small slices of black olives to create pupils for a spooky effect.
      1 blank store-bought pizza dough
    10. Use kitchen scissors or a knife to carefully cut additional pepperoni slices into thin strips for extra bandages, and place them across the pizza as desired.
      1 blank store-bought pizza dough
    11. Serve your Halloween Mummy Pizza hot, with the eyes and bandages creating a fun, spooky presentation.

    This Halloween, transform your dining table into a spooky scene with these irresistibly fun mummy pizzas. They’re easy to assemble, packed with flavor, and guaranteed to spark smiles (and maybe a few giggles). Plus, once you get the hang of it, this recipe is a wonderful way to involve everyone in the kitchen chaos.

    Enjoy the thrill of a culinary costume that’s as tasty as it is charming. Whether it’s a party centerpiece or a surprise snack, these pizzas bring just the right amount of creepy comfort to the season. Happy haunting and eating!

  • White Chicken Chili: A Cozy Twist for Your Weeknight Dinners

    White Chicken Chili: A Cozy Twist for Your Weeknight Dinners

    Imagine the comforting aroma of simmering chili, but with a gentler, creamier twist that surprises your senses. White chicken chili uses tender shredded chicken and cannellini beans, all bathed in a broth brightened with lime and smoky spices. It’s the kind of dish that whispers warmth and satisfaction, perfect for those chill evenings or when you need a quick, nourishing meal.

    This recipe shines because it’s a game of contrasts: the heat from cumin and chili powder, the coolness of sour cream stirred in at the end, and the buttery pop of fresh cilantro. It’s often overlooked in favor of its red cousin, but it shines equally bright with its subtle, soothing flavors. Once you fall for the gentle, hearty bowl, there’s no going back.

    White Chicken Chili

    White chicken chili is a hearty soup made with shredded chicken, cannellini beans, and a flavorful broth infused with cumin, chili powder, and lime. It has a creamy yet chunky consistency, garnished with fresh cilantro and a swirl of sour cream. The dish combines tender ingredients with spices to create a comforting, textured bowl.
    Prep Time 15 minutes
    Cook Time 30 minutes
    Total Time 45 minutes
    Servings: 4
    Course: Main Course
    Cuisine: American
    Calories: 320

    Ingredients
      

    • 1 lb boneless, skinless chicken breasts or thighs cooked and shredded
    • 2 cans cannellini beans drained and rinsed
    • 4 cups chicken broth
    • 1 cup diced onion
    • 2 teaspoons cumin
    • 1 teaspoon chili powder
    • 1 lime lime juice freshly squeezed
    • 1 cup sour cream for stirring in and serving
    • 2 tablespoons olive oil
    • ½ cup chopped fresh cilantro for garnish

    Equipment

    • Saucepan or Dutch oven
    • Wooden spoon or spatula

    Method
     

    1. Shred cooked chicken into bite-sized pieces, setting aside.
    2. Sauté diced onion in olive oil in a large saucepan over medium heat until translucent and fragrant, about 5 minutes.
    3. Add cumin and chili powder to the onions, stirring for about 30 seconds until spices become aromatic.
    4. Pour in the chicken broth and bring the mixture to a gentle simmer, allowing flavors to meld for 5 minutes.
    5. Add the shredded chicken and cannellini beans to the broth, stirring to combine, then cook for another 10 minutes until heated through.
    6. Stir in fresh lime juice to brighten the flavors, then remove from heat.
    7. Ladle the hot chili into bowls, then swirl in a dollop of sour cream and garnish with chopped cilantro.
    8. Serve immediately, enjoying the creamy, fragrant aroma and hearty texture of the soup.
    This white chicken chili is the kind of dish that feels like a warm conversation on a busy night. It’s swift to prepare and leaves plenty of room to add your own twists — maybe a dash of hot sauce or a sprinkle of feta. Its simplicity makes it a staple you’ll want to keep in the weekly rotation.

    Sharing a bowl of this chili brings a moment of calm and comfort, no matter how hectic the day has been. It’s more than just a meal; it’s a small ritual of care, easy to start and even easier to love.

  • The Hidden Charm of Turkey Chili: A Cozy Winter Surprise

    The Hidden Charm of Turkey Chili: A Cozy Winter Surprise

    Few dishes evoke the warmth of a chilly evening like a hearty bowl of turkey chili. But what if you could elevate this comfort food with a surprising twist that will make your taste buds dance? I discovered that swapping ground beef for lean turkey doesn’t just cut calories; it adds a subtle, savory depth that pairs beautifully with smoky spices and roasted veggies. This recipe is my secret weapon for sneaking wholesome ingredients into a dish that’s already so inviting.

    Imagine the aroma of cumin, ancho chili, and garlic simmering together, hinting at adventures from distant lands. The process is straightforward, but the flavor list feels like a carefully curated spice market. It’s deeply satisfying to serve a bowl that looks rich but feels light, especially when topped with a dollop of sour cream and a handful of fresh cilantro. This turkey chili doesn’t just fill the belly—it sparks joy during the chilliest nights.

    **WHY I LOVE THIS RECIPE?**

    • The aroma instantly lifts my mood, filling the house with warm, spicy goodness.
    • It’s a perfect way to use up leftovers, turning them into something spectacular.
    • Each spoonful offers a balanced mix of heat, sweetness from peppers, and savory turkey.
    • The simplicity of assembly makes it ideal for busy weeknights yet impressive enough for guests.
    • It reminds me of childhood winter dinners, comfort that stays with me.

    **AVOID MY DISASTER (You’re Welcome)**

    • FORGOT to drain the excess grease—ended up with greasy chili; fix: rinse and pat dry.
    • DUMPED too much salt—made it inedible; fix: add a splash of vinegar or sugar.
    • OVER-TORCHED the onions—bitter flavor; fix: add a little broth and scrap the burnt bits.
    • FORGOT to check the simmer—watered-down flavor; fix: simmer longer uncovered for concentration.

    **QUICK FIXES THAT SAVE YOUR DAY**

    • When too bland, splash in a splash of lime juice and stir.
    • Patch over a smoky taste with a dollop of Greek yogurt.
    • Shield from over-spicing by adding a handful of shredded zucchini—cools spices and adds moisture.
    • When ingredients are missing, toss in a can of diced tomatoes for richness.
    • Drop a bay leaf during simmering for added depth and aroma—crackle as it dissolves.

    In the end, this turkey chili becomes more than just a weekday meal. It’s a reminder that simple ingredients, when thoughtfully combined, create moments of genuine comfort. As the season changes and you seek warmth in familiar flavors, this dish delivers with ease and heart. It’s guaranteed to become part of your winter rotation, no matter how hectic life gets.

    Turkey Chili

    This turkey chili is a hearty stew made with lean ground turkey simmered with spices, roasted vegetables, and tomatoes. It develops a rich, thick texture with a flavorful, smoky aroma from cumin, chili powder, and garlic, topped with fresh herbs and a dollop of sour cream for creaminess.
    Prep Time 15 minutes
    Cook Time 30 minutes
    Total Time 45 minutes
    Servings: 4
    Course: Main Course
    Cuisine: American
    Calories: 350

    Ingredients
      

    • 1 lb lean ground turkey preferably lean
    • 1 medium onion diced
    • 3 cloves garlic minced
    • 2 cups roasted peppers chopped
    • 1 can (14.5 oz) diced tomatoes with liquid
    • 2 tbsp chili powder smoky
    • 1 tsp ground cumin
    • to taste salt and pepper
    • 1 tablespoon olive oil
    • 0.5 cup shredded cheese optional, for topping
    • 1 cup sour cream for serving
    • a handful fresh cilantro chopped, for garnish

    Equipment

    • Large skillet or Dutch oven
    • Wooden spoon or spatula

    Method
     

    1. Heat olive oil in a large skillet over medium heat. Add diced onion and cook until it becomes translucent and fragrant, about 3-4 minutes.
    2. Add minced garlic to the skillet and cook for another 30 seconds until it releases a fragrant aroma.
    3. Pour in the ground turkey and break it apart with a wooden spoon, cooking until it’s browned all over and no pink remains, about 5-6 minutes.
    4. Add the chopped roasted peppers to the skillet for a smoky flavor, stirring to combine.
    5. Stir in chili powder, cumin, salt, and pepper to coat the meat and vegetables evenly, allowing the spices to toast slightly and become fragrant.
    6. Pour in the diced tomatoes with their liquid, stirring well to combine all ingredients.
    7. Bring the mixture to a gentle simmer, then reduce heat to low and let it cook uncovered for 20-25 minutes, stirring occasionally until thickened and flavors meld.
    8. Taste and adjust seasoning with more salt or pepper as needed, then remove from heat.
    9. Serve the hot chili in bowls, topped with shredded cheese, a dollop of sour cream, and a sprinkle of chopped cilantro for freshness.

    This recipe isn’t just about filling your belly—it’s about creating nourishing moments amid busy days. The gentle heat and savory profile make it perfect for sharing, whether with family or a quiet evening alone. Every spoonful rekindles memories of chilly nights spent cozying up with good food and good company.

    While ingredients can be flexible, the spirit of this dish lies in its warmth and simplicity. It’s proof that an excellent chili doesn’t need exotic ingredients—just honest flavors and a little patience. As you ladle this into bowls, you’re holding more than just dinner—you’re holding a small piece of comfort that satisfies mind, body, and soul.