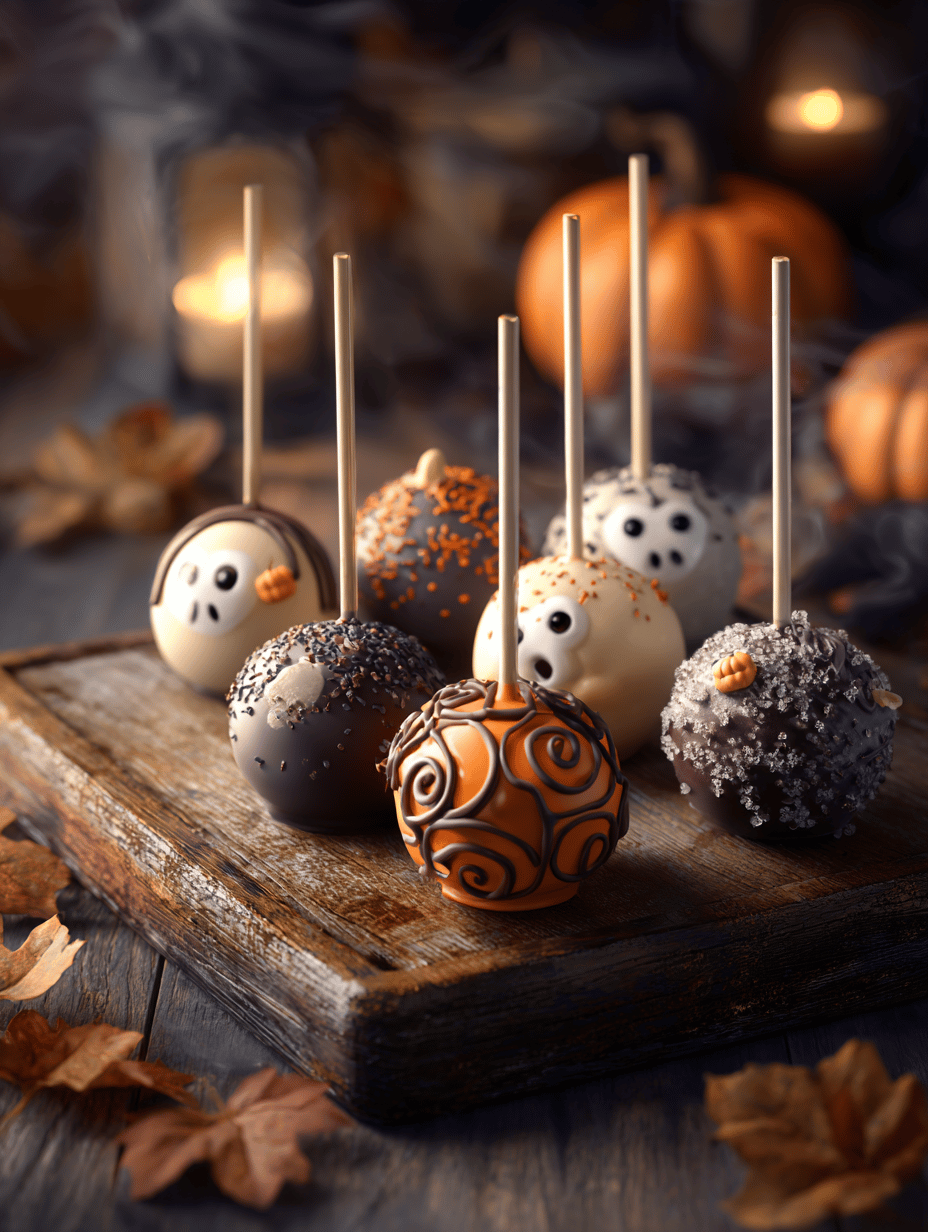
Halloween cake pops are my go-to project for the season’s chaos. They’re a small, portable canvas for all kinds of spooky, silly, or eerie decorations. The best part? You can customize them to match any party vibe, from creepy to cute. Plus, they’re more forgiving than full cakes, perfect for late-night kitchen improvising.
Why I Keep Coming Back to These Halloween Cake Pops
They’re endlessly customizable, mixing chaos and charm in every bite. Plus, they’re surprisingly forgiving, which makes the mess fun rather than frustrating. I love how they turn out—sometimes spooky, sometimes silly, always a hit. They remind me that a little creative chaos is what makes baking memorable.
Spooky Ingredients & How They Play in Your Cake Pops
- Chocolate or Candy Melts: Provides that glossy, spooky shell. Swap with white chocolate or almond bark if needed.
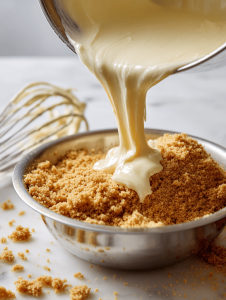
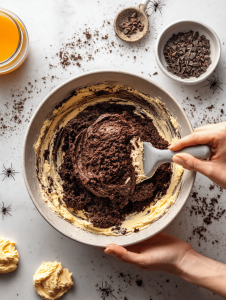
- Cake crumbs or leftover cake: The base. Use any flavor, even spice cake for extra zing.
- Lollipop sticks: Handles. Choose sturdy, long ones for easier dipping.
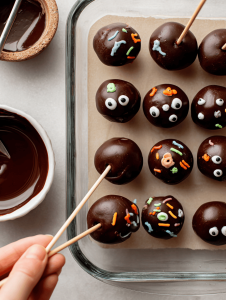
- Decorative sprinkles or edible eyes: Adds those creepy or cute details. Anything textured or glittery works.
- Coconut oil or shortening: Helps melt chocolate smoothly. Skip if you prefer a thicker coating.
- Food coloring or gel dyes: Color your coating or decorations. Use sparingly for vibrant results.
- Edible markers or piping gels: Fine details. Use for tiny faces or intricate designs.
Tools of the Spook-tacular Trade
- Double boiler or microwave-safe bowl: Melts chocolate evenly without burning.
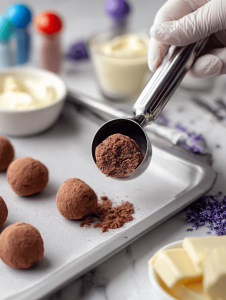
- Ice cream scoop: Helps shape uniform cake balls.
- Lollipop sticks: Supports the cake balls and makes dipping easier.
- Parchment paper: Prevents sticking and helps with easy cooling.
- Decorating brushes or piping bags: Adds detailed spooky touches.
Step-by-Step Guide to Crafting Your Halloween Cake Pops
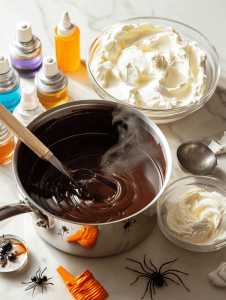
Step 1: Start by melting your chocolate with a splash of coconut oil, stirring until smooth and shiny.
Step 2: Use a small ice cream scoop to form compact, uniform balls of cake mixture, then chill for at least 30 minutes.
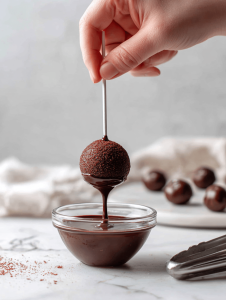
Step 3: Insert a lollipop stick into each ball, then dip into the melted chocolate, turning gently to coat.
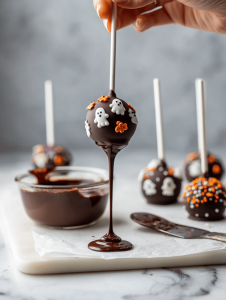
Step 4: Place the coated pops on parchment paper, add spooky decorations, and let set in a cool, dry place for 1 hour.
Cooking Checkpoints & Tips for Halloween Cake Pops
- Chocolate should be glossy and smooth before dipping.
- Cake balls should be firm but not frozen solid, to prevent cracking.
- Decorations should stick well when the coating is still slightly tacky.
- If chocolate cracks, warm it slightly to restore smoothness.
Halloween Cake Pop Pitfalls & How to Dodge Them
- Chocolate is too thick to coat smoothly.? USE room temp chocolate; if too thick, add a tiny bit of coconut oil.
- Cake balls fall apart during dipping.? Chill cake balls thoroughly; if sticky, freeze for 10 more minutes.
- Chocolate coating cracks or flakes off.? Dip quickly but gently; if chocolate cracks, warm it slightly.
- Cake pops look dull or streaky.? Avoid overhandling; if chocolate gets dull, re-melt briefly.
Halloween Cake Pops
Ingredients
Equipment
Method
- Start by melting the chocolate or candy melts with a tablespoon of coconut oil in a microwave-safe bowl, heating in 30-second intervals and stirring until smooth and glossy.
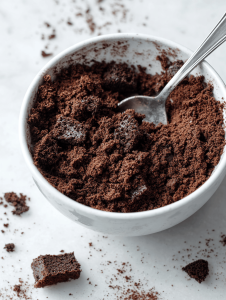
- Use an ice cream scoop to portion out your cake crumbs into small, compact balls, then place them on a baking sheet lined with parchment paper. Chill in the refrigerator for at least 30 minutes to firm up.
- Once chilled, insert a lollipop stick into each cake ball, pushing about halfway in.
- Dip each cake ball into the melted chocolate, turning gently to coat evenly, then tap off any excess.
- Set the coated cake pops upright on parchment paper to set, adding sprinkles or edible eyes while the coating is still slightly tacky for easy adhesion.
- Allow the cake pops to set at room temperature for about an hour, or refrigerate for quicker setting.
- Once set, add any additional details with decorating brushes or piping gels for extra spooky or cute touches.
- Finally, enjoy these charming Halloween cake pops that are perfect for sharing and celebrating the season.

Welcome to Owning This Stove. I’m so glad you’re here. I’m a food blogger, recipe developer, and storyteller who believes food is one of the most honest ways to understand a place, a person, or a moment in time. This blog is where I collect those moments, from quiet mornings in unfamiliar kitchens to crowded cafés filled with conversation and clinking cups.